This ahi tuna recipe -seared is all about quick cooking and big flavors. In just a few minutes, you can achieve a restaurant-quality dish that’s tender, flavorful, and healthy. The trick lies in a quality cut of fresh tuna, a sizzling hot pan, and a few smart techniques to lock in the taste.
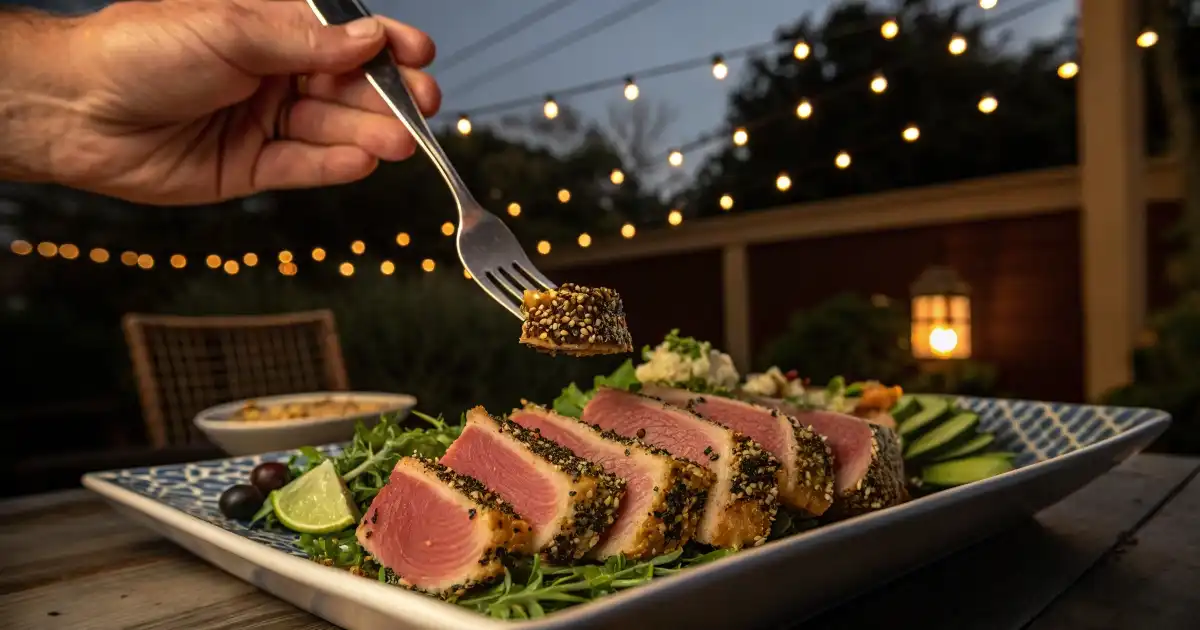
Table of Contents
Introduction
Is there anything more thrilling than that moment when you flip a sizzling piece of tuna and reveal a perfectly caramelized, golden crust? Cooking fish at home often feels like tiptoeing across a culinary tightrope. On one side, you risk overcooking and ending up with a tough, rubbery result. On the other, you aim for a delicate, near-raw center that brings out the luxurious texture of a top-notch cut. That’s where this ahi tuna recipe -seared guide comes in to save the day (and your dinner).
You might be feeling a little nervous if you’ve never tried a seared tuna dish before. But rest assured, it’s simpler than you might imagine. In this playful, yet informative exploration, you’ll learn exactly how to select fresh tuna, how to season it with bold or subtle flavors, and how to sear it so impeccably that your friends will wonder if you secretly studied under a master chef. Along the way, we’ll reference the expertise of culinary pros and even a few scientific insights about cooking techniques.
If you’ve ever had a mouthwatering seared tuna at a fancy restaurant and thought you could never replicate that moment of bliss at home, prepare to change your mind. From marinade tips to garnish ideas, this ahi tuna recipe -seared breakdown will help you discover the joy of cooking a dish that’s high in protein, healthy fats, and crowd-pleasing appeal. Ready to take a deep dive into this succulent world of tuna magic? Let’s get started!
Disclaimer: This article is for informational purposes only and does not replace medical advice. Always consult experts or trusted sources when choosing your diet. Individual preferences and needs vary.
Why Choose Ahi Tuna?
Before diving into the ahi tuna recipe -seared magic, you might wonder, “Why ahi tuna in particular?” Ahi tuna (also known as yellowfin tuna) is prized for its mild flavor, tender texture, and versatility. It’s the kind of fish that has a firm enough texture to withstand a quick, high-heat sear, yet remains melt-in-your-mouth tender on the inside. Culinary experts point out that tuna can be an excellent source of lean protein and essential nutrients like omega-3 fatty acids.
Key Characteristics of Ahi Tuna
- Mild Flavor: Ahi tuna is not overpoweringly “fishy,” making it appealing even for those who are tentative about seafood.
- Firm Texture: Its sturdy texture allows for creative cooking methods, including pan-searing, grilling, or even raw preparations like poke bowls.
- Health Profile: Rich in protein, relatively low in fat, and a good source of vitamins and minerals, ahi tuna is a favorite among health-conscious eaters.
There are, of course, other types of tuna (like albacore or bluefin), but we focus on the bright, meaty clarity of ahi. It’s widely available and consistently yields fantastic results in an ahi tuna recipe -seared approach.
How to Select Fresh Ahi Tuna
No ahi tuna recipe -seared tutorial is complete without first discussing the importance of freshness. When selecting tuna steaks, look for the following:
- Color: Fresh ahi tuna should range from a deep red to a vibrant, almost translucent pinkish-red. Avoid brown spots or dull flesh.
- Smell: A mild, clean scent is ideal. Any strong or “off” odor is a sign to steer clear.
- Texture: The tuna should feel firm to the touch. If it’s mushy or overly soft, it may not be fresh.
If possible, buy your fish the same day you plan to cook it. If that’s not an option, you can store fresh tuna in the coldest part of your refrigerator for up to two days. Place it on a bed of ice or wrap it tightly in plastic and keep it in a sealed container to maintain optimal freshness. Because this ahi tuna recipe -seared is primarily about letting the fish shine, quality counts, and freshness can make all the difference in taste.
Tools and Ingredients You’ll Need
Essential Tools
- Heavy-Bottomed Skillet or Cast-Iron Pan: You need a pan that can handle high heat without warping.
- Tongs or Spatula: For flipping the tuna quickly and safely.
- Meat Thermometer (Optional): While many rely on the “feel” of the fish, a thermometer can be reassuring, especially for beginners. For a rare center, look for about 115°F to 120°F internal temperature.
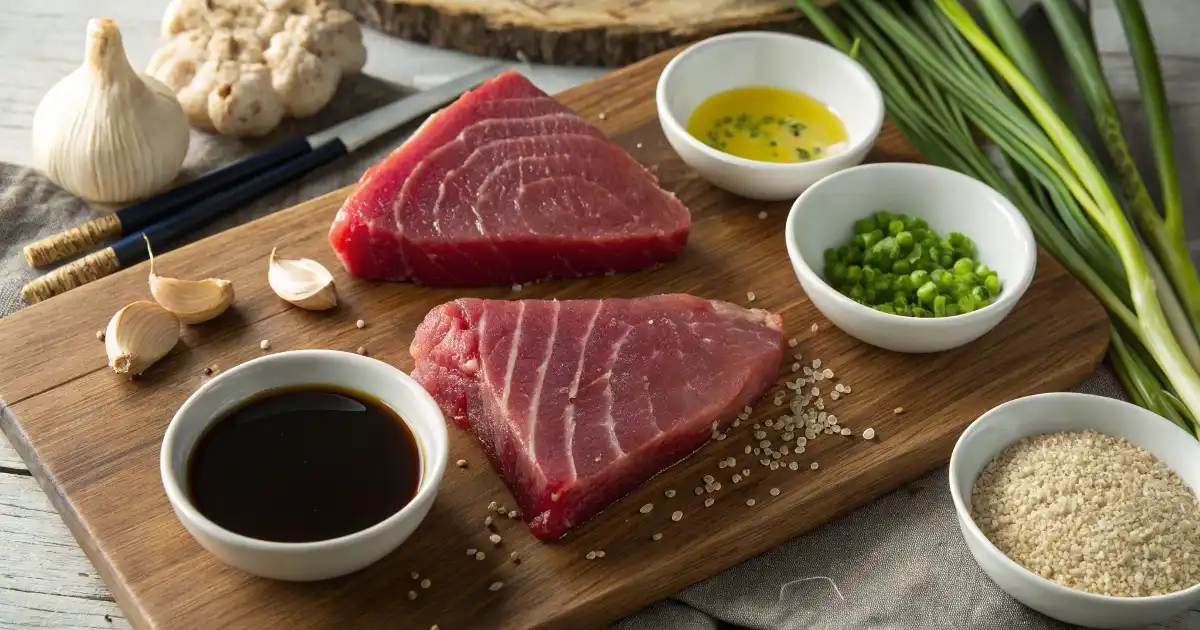
Core Ingredients
- Tuna Steaks: For an ahi tuna recipe -seared result, choose steaks around 1 to 1.5 inches thick. Thinner cuts may overcook too fast, and thicker cuts might not cook evenly without adjusting technique.
- Salt & Pepper: Or your favorite seasoning blend. Keep it simple or go bold with spices like paprika and garlic powder.
- High-Smoke-Point Oil: Olive oil, avocado oil, or canola oil works. Sesame oil can also be used but may impart a stronger flavor.
- Optional Marinade or Rub: Think soy sauce, ginger, garlic, lemon juice, or wasabi. The marinade is a fantastic way to add variety to your ahi tuna recipe -seared dish.
Step-by-Step: Classic Ahi Tuna Recipe -Seared
This is the base method. Once you’ve mastered it, you can experiment with more adventurous seasonings and sauces.
1. Pat Dry and Season
- Dry the Steaks: Remove your tuna from the fridge about 15-20 minutes before cooking. Pat each steak dry with paper towels.
- Season Generously: Rub each side with salt, pepper, and any spices you like. A simple blend could be kosher salt and coarsely ground black pepper, but you can also use chili flakes, garlic powder, or a drizzle of soy sauce if you wish.
Tip: Removing excess moisture helps you get that characteristic crust that defines a perfect ahi tuna recipe -seared outcome.
2. Preheat the Pan
- Crank Up the Heat: Place your skillet on high heat. Add a thin layer of oil and wait until the oil is shimmering—almost, but not quite, smoking.
- Test Readiness: You can sprinkle a few drops of water into the pan. If they sizzle and evaporate immediately, you’re ready to go.
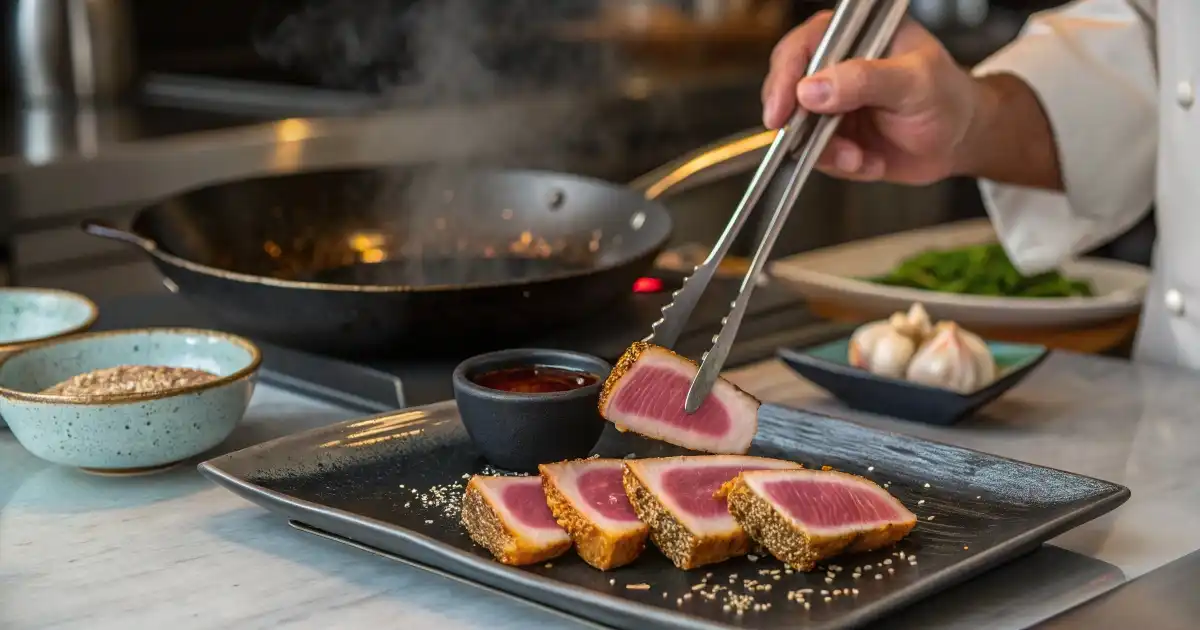
3. Sear, Don’t Overcook
- Lay the Tuna Down Gently: Slide each tuna steak into the hot oil. Let it cook for about 1 to 2 minutes on the first side, depending on your thickness preference.
- Flip and Repeat: Flip using tongs or a spatula. Cook the second side for another 1 to 2 minutes.
- Sear the Edges: If you prefer, you can briefly sear the edges by holding the steak upright with tongs. This is optional but gives you a uniform look.
Important: For that perfect ahi tuna recipe -seared inside, you want the center to remain rare or at most medium-rare. Overcooking can lead to a tough, dry texture.
4. Rest and Slice
- Rest the Fish: Transfer the tuna to a plate or cutting board. Rest it for a minute or two to allow the juices to settle.
- Slice Against the Grain: Using a sharp knife, slice the tuna into thin strips, about a quarter-inch thick. This makes for a stunning presentation and optimal tenderness.
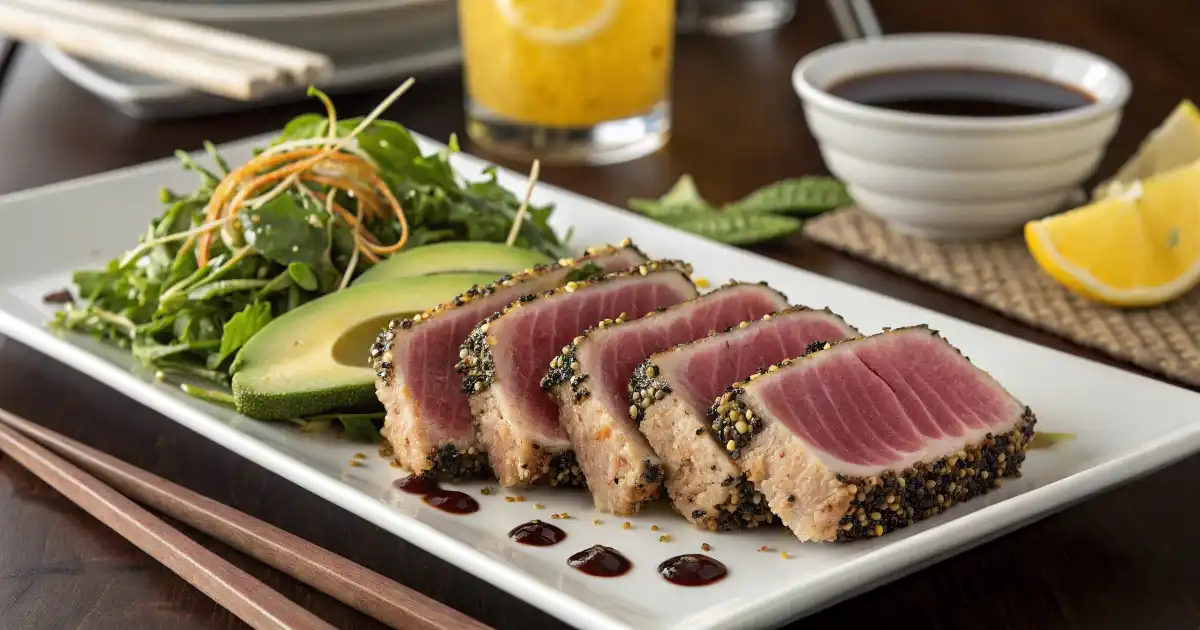
5. Serve and Enjoy
- Garnish: Top with sesame seeds, chopped scallions, or a drizzle of your favorite sauce (like a wasabi soy sauce).
- Side Dishes: Common pairings include a fresh green salad, stir-fried vegetables, or a simple rice bowl.
Flavor Variations for Ahi Tuna Recipe -Seared
Variety is the spice of life. This saying is especially true once you’ve mastered the basic ahi tuna recipe -seared technique. Here are several tantalizing twists to keep your taste buds excited:
- Asian-Inspired Marinade
- Ingredients: Soy sauce, fresh grated ginger, minced garlic, a splash of sesame oil.
- Method: Marinate the tuna for 20–30 minutes before searing.
- Result: An umami-rich exterior with a lightly charred, savory bite.
- Cajun-Style Rub
- Ingredients: Paprika, cayenne pepper, dried thyme, garlic powder, salt, pepper.
- Method: Coat the tuna thoroughly before searing in a hot cast-iron skillet.
- Result: A bold, spicy crust that pairs well with cooling side dishes like coleslaw or cucumber salad.
- Citrus Zest
- Ingredients: Lemon zest, lime zest, minced chili, salt, pepper.
- Method: Mix the zest and chili, then rub the tuna steaks. Let rest 10 minutes.
- Result: A bright, tangy aroma that cuts through the richness of the fish.
- Herb-Crusted
- Ingredients: Finely chopped basil, parsley, or cilantro mixed with salt, pepper, a dash of olive oil.
- Method: Press the herb mixture onto each side of the tuna. Sear quickly.
- Result: Fresh and aromatic, perfect for a summery meal.
By experimenting with different seasonings, you’ll discover countless ways to elevate your ahi tuna recipe -seared repertoire.
Balancing Nutrition and Flavor
Ahi tuna is popular among health enthusiasts for a reason: it’s nutrient-dense. According to the American Heart Association, fish rich in omega-3 fatty acids supports heart health when consumed in moderation. Here’s why many love an ahi tuna recipe -seared from a nutritional standpoint:
- High Protein: Ahi tuna is packed with protein, essential for muscle growth and repair.
- Omega-3 Fatty Acids: These good fats can help maintain cardiovascular health.
- Minerals and Vitamins: You’ll find key nutrients like selenium, potassium, and B vitamins.
However, moderation is key. Mercury content can be higher in larger fish like tuna. That doesn’t mean you should avoid an ahi tuna recipe -seared dish altogether—just stay informed and balanced. The FDA advises limiting certain high-mercury fish if you’re pregnant or nursing. Always cross-check with reputable sources or a medical professional to see if it aligns with your individual health needs.
Cooking Science: Why Searing Works
Ever wonder why a quick sear creates such a remarkable flavor in your ahi tuna recipe -seared approach? It all comes down to the Maillard reaction—a chemical reaction that occurs when proteins and sugars in the fish are exposed to high heat. This reaction forms a browned crust that enhances flavor complexity.
Key Elements of the Perfect Sear
- High Heat: Ensures rapid browning without overcooking the interior.
- Dry Surface: Removing excess moisture is crucial for even browning.
- Short Cooking Time: Preserves the tender, almost sashimi-like quality in the center.
If you keep these factors in mind, you’ll achieve a top-notch ahi tuna recipe -seared result every single time.
Common Mistakes to Avoid
- Overcooking: The biggest pitfall in an ahi tuna recipe -seared dish is letting it linger too long in the pan. Aim for a 1–2 minute sear per side.
- Not Preheating the Pan: If the pan isn’t hot enough, you’ll get a gray, steamed piece of fish rather than a golden-brown crust.
- Skipping the Rest: Slicing the tuna immediately can cause the juices to run out. Give it a brief rest.
- Using Low-Quality Tuna: Since this method highlights the fish itself, lower-grade tuna will affect the overall experience.
Serving Suggestions and Side Dishes
The beauty of an ahi tuna recipe -seared dish lies in its adaptability. You can serve it with a rainbow of side dishes that complement tuna’s mild flavor:
- Asian Slaw: Crunchy cabbage, carrots, and a tangy dressing that cuts through the richness of the fish.
- Steamed or Stir-Fried Veggies: Broccoli, bell peppers, zucchini—anything bright and crisp works well.
- Rice or Quinoa: A neutral base that soaks up extra sauce.
- Green Salad: Top your tuna slices over mixed greens with a light vinaigrette.
- Cauliflower Rice or Zoodles: Perfect if you’re looking for low-carb options but still want a hearty feel.
Personal Anecdotes and Expert Tips
As someone who’s experimented with countless fish recipes, I’ll never forget the first time I cooked an ahi tuna recipe -seared dish for friends. I was worried it would lack flavor or turn out chewy. Instead, the applause I received after slicing open that beautiful pink center gave me the confidence to try new seasonings and pairings. Over time, I’ve learned a few tips:
- Paper Towel Trick: After seasoning, I give the tuna steaks one more quick blot with a paper towel. This ensures the outside is extra dry.
- Instant-Read Thermometer: While many pros rely on touch, using a thermometer can be your safety net. Aim for about 115°F for a rare center.
- Sauce on the Side: Instead of dousing the fish in sauce, serve a small bowl of dipping sauce. This keeps the fish’s natural flavor front and center.
These insights might sound minor, but they can make a significant impact on your ahi tuna recipe -seared success.
Frequently Asked Questions (FAQs)
Below, you’ll find the most relevant user questions related to our ahi tuna recipe -seared journey. Each question is presented twice—once in its original paraphrased form for clarity, and again reworded to maintain the same intent while adding variety. Each answer is concise, limited to 3 sentences, and includes our focus keyword.
1: How do I make an easy version of this seared tuna recipe?
A quick and simple ahi tuna recipe -seared only requires salt, pepper, and a hot pan. Pat the tuna dry, season, and sear each side for about one minute. Serve immediately for a fresh, melt-in-your-mouth taste.
2: What is the top method to achieve the perfect seared tuna?
The best ahi tuna recipe -seared involves a blazing-hot skillet, minimal seasoning, and quick cooking. You want a crisp crust on the outside and a cool, rare center inside. This balance gives you the perfect texture and taste.
3: Can I marinate my ahi tuna before searing?
Yes, marinating can enhance flavor in an ahi tuna recipe -seared dish. Aim for 20–30 minutes in a simple soy-ginger or citrus marinade. Over-marinating may overpower the fish’s delicate taste.
4: How long should I sear ahi tuna on each side?
For an ahi tuna recipe -seared approach, 1 to 2 minutes per side is standard. This quick sear ensures a golden crust but a rare center. Adjust slightly if you prefer it more or less done.
5: Which oil is best for searing ahi tuna?
For an ahi tuna recipe -seared outcome, use oils with a high smoke point like avocado, canola, or vegetable oil. These handle intense heat without burning. Sesame oil adds flavor but can smoke faster, so use it carefully.
6: Do I need a specific type of pan for searing?
A heavy-bottomed cast-iron or stainless-steel skillet is ideal for any ahi tuna recipe -seared method. It retains heat well and delivers an even sear. Non-stick pans may not get as hot, affecting the crust formation.
7: What if I overcook the tuna?
If your ahi tuna recipe -seared result turns out dry, slice it thin and top with a sauce or dressing. A zesty marinade can help reintroduce moisture. Use less cooking time on your next attempt.
8: How can I safely store leftover seared ahi tuna?
Refrigerate leftover ahi tuna recipe -seared portions in an airtight container for up to two days. Enjoy it cold in salads or gently reheat it, taking care not to overcook. Discard if there’s any off smell or appearance.
Conclusion
A perfectly executed ahi tuna recipe -seared strikes a harmonious balance between simplicity and sophistication. With minimal prep and a hot skillet, you can create a dazzling dish that pleases the palate, offers a host of nutritional benefits, and garners impressive compliments. From seasoning tweaks to side-dish inspirations, there’s an entire world of possibilities to explore once you’re comfortable with the basics.
Remember, the key is to respect the fish: choose high-quality, fresh tuna, treat it gently, and cook it just enough to achieve that irresistible crust. Whether you’re cooking for yourself or entertaining guests, this technique is sure to add a touch of culinary magic to your repertoire. Give it a try, experiment with new flavors, and soon you’ll be celebrated for your own personal spin on the classic ahi tuna recipe -seared approach. We’d love to hear about your experiences, so don’t hesitate to share or drop a comment!
Key Takeaways
- Focus on Freshness: High-quality, firm tuna yields the best results.
- High Heat: A blazing-hot pan is essential for a swift, flavorful sear.
- Quick Cooking: 1–2 minutes per side preserves the tuna’s moist interior.
- Experiment with Flavors: Soy-ginger marinades, herb crusts, or spice rubs can elevate your ahi tuna recipe -seared meal.
- Don’t Overdo It: Overcooking is the most common mistake; aim for a rare to medium-rare center.